In this article, we’ll be exploring the process of creating a VS Code extension from scratch – perfect for beginners. We’ll cover the essential steps and provide clear instructions to help you get started with your own extension. Whether you’re new to coding or just new to creating extensions, this guide will walk you through the necessary tools and techniques. By the end of this article, you’ll have a solid foundation to begin developing your very own VS Code extension.
Table of Contents
A Beginner’s Guide to Creating a VS Code Extension
What is a VS Code Extension
Understanding the purpose of VS Code extensions
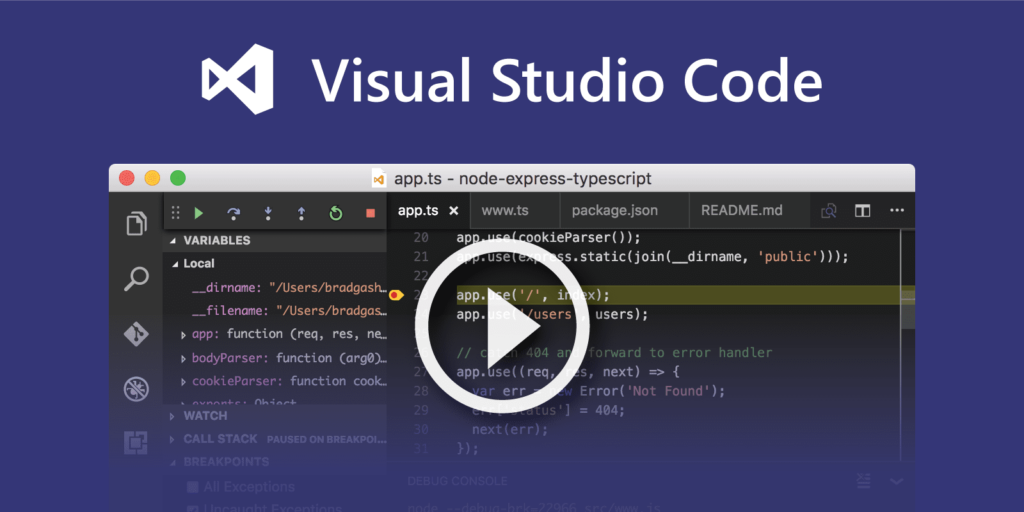
Visual Studio Code, also known as VS Code, is a popular open-source code editor developed by Microsoft. It is highly customizable and extensible, making it a favorite among developers of all kinds. One of the biggest advantages of VS Code is its vast library of extensions, which allow users to enhance their coding experience and tailor the editor to their specific needs.
VS Code extensions are small software modules that add new features or extend the functionality of the editor. They can range from simple modifications like custom syntax highlighting or code snippets, to more complex integrations with external tools and services. Extensions are written using JavaScript or TypeScript and can leverage the powerful APIs provided by the VS Code extension development framework.
Exploring the benefits of using VS Code extensions
Using VS Code extensions can greatly enhance your productivity as a developer. Here are some of the benefits they offer:
-
Improved coding experience: Extensions can provide additional features like code formatting, automatic completion, and intelligent code suggestions, making it easier to write clean and efficient code.
-
Language support: With the help of extensions, you can work with a wide range of programming languages and frameworks. Extensions can provide syntax highlighting, linting, and other language-specific tools, ensuring that your code is error-free and properly formatted.
-
Customization: VS Code extensions allow you to personalize your editor to suit your preferences. You can choose themes, icons, and layouts that resonate with your workflow, making the coding experience more enjoyable.
-
Integration with external tools: Extensions can integrate with external tools and services, allowing you to seamlessly work with source control systems, task runners, debugging tools, and more. This enables you to streamline your development workflow and improve collaboration with your team.
-
Growing ecosystem: The VS Code extension ecosystem is vibrant and constantly evolving. There are thousands of extensions available for almost any development task or language. This means that you can easily find and install extensions that meet your specific needs, saving you time and effort.
Now that you understand the purpose and benefits of VS Code extensions, let’s dive into the process of creating your own extension.
Getting Started
Before you can start creating your own VS Code extension, you need to have Visual Studio Code installed on your machine. If you don’t have it already, you can download it from the official website and follow the installation instructions for your operating system.
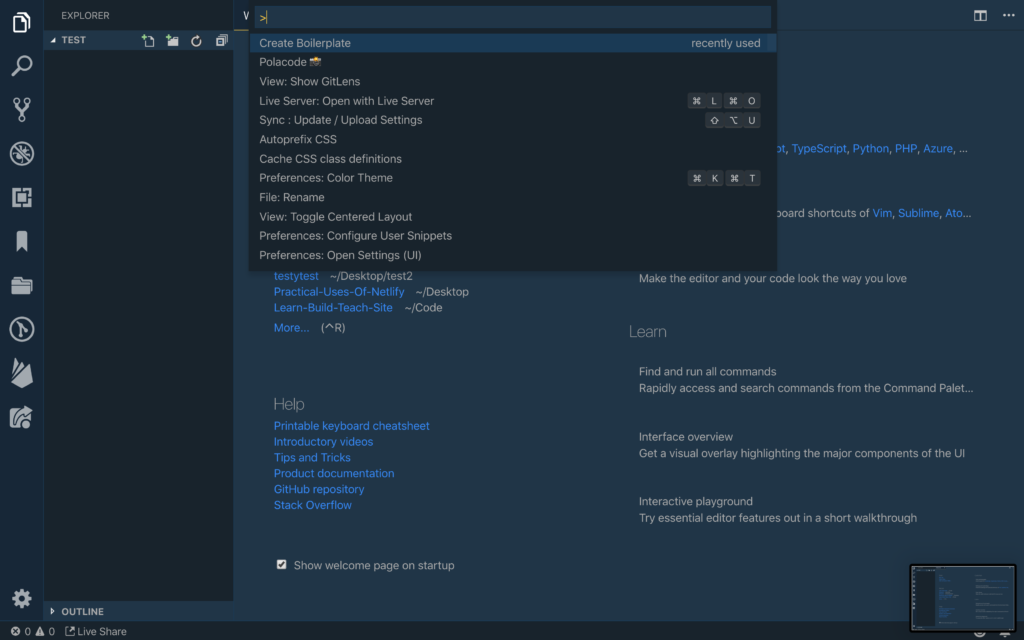
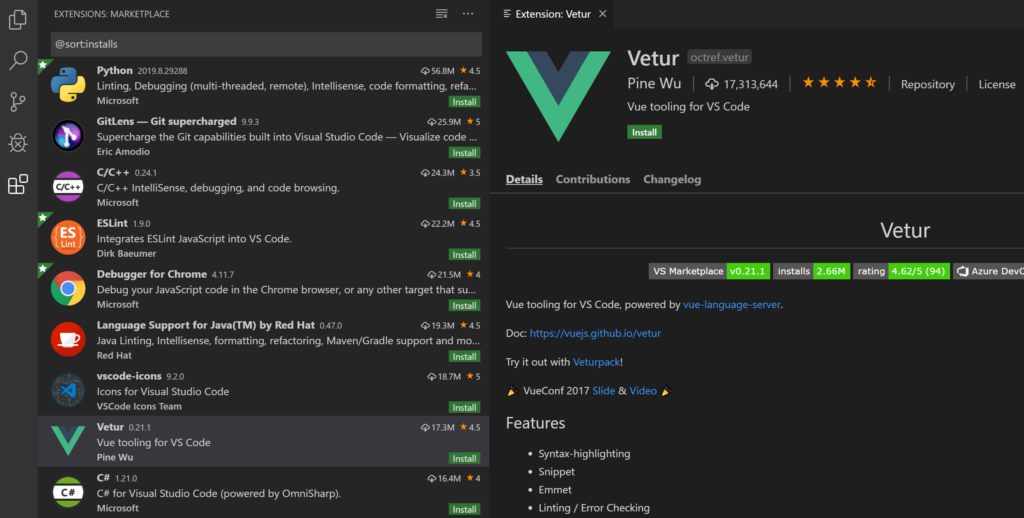
Once you have VS Code installed, you can familiarize yourself with its interface. VS Code has a clean and intuitive user interface, with a sidebar on the left and a tabbed editor area in the center. The sidebar provides quick access to various views, including the Extensions view, which is where you can manage and install extensions.
To open the Extensions view, you can either click on the last icon on the sidebar or use the shortcut Ctrl+Shift+X (or Cmd+Shift+X on macOS). In the Extensions view, you can search for extensions, install them, and manage your installed extensions.
Setting Up the Development Environment
Once you have VS Code installed and are familiar with its interface, it’s time to set up your development environment for creating extensions.
Installing Node.js and npm
VS Code extensions are developed using JavaScript or TypeScript, so you need to have Node.js and npm (Node Package Manager) installed on your machine. Node.js is a JavaScript runtime that allows you to execute JavaScript code outside of a browser, and npm is a package manager for installing and managing JavaScript libraries and tools.
You can download Node.js from the official website and follow the installation instructions for your operating system. Node.js comes bundled with npm, so once you have Node.js installed, you will also have npm available.
To verify that Node.js and npm are installed correctly, you can open a terminal or command prompt and run the following commands:
node --version npm --version If the commands display the versions of Node.js and npm, you’re all set!
Configuring the required tools and dependencies
Before you can start creating your extension, you need to configure a few tools and dependencies. Luckily, VS Code provides a helpful command-line tool called yo code (short for Yeoman code) that helps generate the necessary project structure and files for an extension.
To install the yo code tool, open a terminal or command prompt and run the following command:
npm install -g yo generator-code This will install the Yeoman generator for VS Code extensions globally on your machine.
Once yo code is installed, you can use it to scaffold a new extension project. Open a terminal or command prompt, navigate to the directory where you want to create your extension, and run the following command:
yo code This will prompt you with a series of questions to configure the project. You can choose the default options for most of the questions unless you have specific preferences. Once the scaffolding process is complete, you will have a basic project structure and files for your extension.
Creating a new folder for your extension
Navigate to the directory where you want to create your extension project, and create a new folder to contain all the extension files. You can name the folder anything you like, but it’s a good practice to use a descriptive name that reflects the purpose or functionality of your extension.
For example, if you’re creating an extension for linting HTML code, you could name the folder “html-linter”. Once the folder is created, move all the files generated by the yo code command into that folder.
Congratulations! You have set up your development environment and are ready to start creating your VS Code extension.
Creating the Extension Manifest
The extension manifest is a file named “package.json”. It contains metadata about your extension, such as its name, version, author, description, and dependencies. The manifest file is crucial as it provides information to VS Code about your extension and how it should be loaded and executed.
Understanding the purpose of the manifest file
The manifest file serves as the entry point for your extension. It informs VS Code about the capabilities and features your extension provides, and how it should be activated when the user interacts with the editor.
Here is an example of a basic extension manifest file:
{ "name": "my-extension", "displayName": "My Extension", "version": "0.1.0", "publisher": "your-name", "description": "A description of your extension.", "categories": ["Languages"], "activationEvents": ["onCommand:extension.myExtensionCommand"], "main": "./out/extension.js", "contributes": {} } Let’s go over some of the important properties in the manifest file and their purpose:
-
“name”: The unique identifier for your extension. It should be lowercase and not contain spaces or special characters.
-
“displayName”: The human-readable name of your extension.
-
“version”: The version number of your extension.
-
“publisher”: Your name or the name of your organization.
-
“description”: A brief description of your extension, describing what it does and why it is useful.
-
“categories”: The categories or tags that your extension belongs to. This helps users discover your extension when searching in the Visual Studio Marketplace.
-
“activationEvents”: The events that trigger the activation of your extension. For example, you can specify that your extension should be activated when a specific command is executed.
-
“main”: The entry point of your extension, which is the JavaScript file where the extension code resides. By convention, this file is located in a folder named “out”.
-
“contributes”: This property is used to declare and configure the contributions your extension makes to the editor, such as custom commands, keybindings, menus, and settings.
By customizing these properties in the manifest file, you can tailor your extension to fulfill your specific requirements.
Building the Extension
Now that you have created the extension manifest, it’s time to build the actual functionality of your extension. This involves writing code that implements the desired features and customizations.
Creating custom commands and keybindings
Custom commands and keybindings are powerful ways to extend the functionality of VS Code. They allow you to define new actions that users can trigger, either by using a keyboard shortcut or through the command palette.
To create a custom command, you need to define it in the extension manifest and implement its logic in your extension code. Here is an example of a custom command declaration in the manifest file:
"commands": [ { "command": "extension.myExtensionCommand", "title": "My Extension Command" } ] In this example, we define a command with the identifier “extension.myExtensionCommand” and a user-friendly title “My Extension Command”. Once the command is defined, you can implement its functionality in your JavaScript code.
To implement the command logic, you need to create a JavaScript file and define a function that will be executed when the command is triggered. Here’s an example of a simple command implementation:
const vscode = require('vscode'); function activate(context) { let disposable = vscode.commands.registerCommand('extension.myExtensionCommand', () => { vscode.window.showInformationMessage('Hello from My Extension!'); }); context.subscriptions.push(disposable); } exports.activate = activate; In this example, we register a command with the same identifier as defined in the manifest file. When the command is executed, it shows an information message in the VS Code status bar saying “Hello from My Extension!”.
To associate a keyboard shortcut with the custom command, you can add a keybinding declaration in the extension manifest. Here’s an example:
"keybindings": [ { "command": "extension.myExtensionCommand", "key": "ctrl+shift+h", "mac": "cmd+shift+h", "when": "editorTextFocus" } ] In this example, the command “extension.myExtensionCommand” is associated with the keyboard shortcut Ctrl+Shift+H on Windows and Linux, and Cmd+Shift+H on macOS. The "when": "editorTextFocus" condition ensures that the shortcut is only active when the editor has focus.
By creating custom commands and keybindings, you can extend the functionality of VS Code to perform specific tasks or automate repetitive actions, saving time and effort.
Managing extension configuration settings
Configuration settings allow users to customize the behavior of your extension. They can control various aspects such as enabling or disabling certain features, changing default values, or setting up external connections.
To define configuration settings for your extension, you need to declare them in the extension manifest using the "configuration" property. Here’s an example:
"configuration": { "myExtension.setting1": { "type": "boolean", "default": true, "description": "Enable or disable setting 1." }, "myExtension.setting2": { "type": "string", "default": "default value", "description": "Setting 2 description." } } In this example, we define two configuration settings: “myExtension.setting1” and “myExtension.setting2”. The first setting is of type boolean and has a default value of true, while the second setting is of type string and has a default value of “default value”. Each setting also has a description to provide more context and guidance to users.
Once the settings are declared in the manifest file, you can access and modify them in your extension code using the vscode.workspace.getConfiguration() method. Here’s an example:
const vscode = require('vscode'); function activate(context) { let disposable = vscode.commands.registerCommand('extension.myExtensionCommand', () => { const config = vscode.workspace.getConfiguration('myExtension'); const setting1Value = config.get('setting1'); const setting2Value = config.get('setting2'); vscode.window.showInformationMessage(`Setting 1 value: $`); vscode.window.showInformationMessage(`Setting 2 value: $`); }); context.subscriptions.push(disposable); } exports.activate = activate; In this example, we retrieve the values of the two configuration settings and display them in separate information messages when the custom command is executed.
By providing configuration settings, you empower users to customize your extension according to their preferences and requirements.
Adding custom UI components and panels
In addition to custom commands and settings, you can also enhance your extension with custom UI components and panels. This allows you to provide a more immersive and interactive experience to users.
Custom UI components can be created using web technologies like HTML, CSS, and JavaScript. You can leverage the VS Code Webview API to embed web content directly into the editor. By doing so, you can build sophisticated UI elements, visualizations, or even full-fledged application interfaces.
To add a custom UI component, you need to define a WebView in your extension code and associate it with a specific view or command. Here’s an example of creating a custom webview panel:
const vscode = require('vscode'); function activate(context) { let disposable = vscode.commands.registerCommand('extension.myExtensionCommand', () => { const panel = vscode.window.createWebviewPanel( 'myExtensionPanel', 'My Extension Panel', vscode.ViewColumn.One, {} ); panel.webview.html = 'Hello from My Extension!
'; }); context.subscriptions.push(disposable); } exports.activate = activate; In this example, we create a webview panel with the identifier “myExtensionPanel” and the title “My Extension Panel”. The panel is positioned in the leftmost column of the editor (vscode.ViewColumn.One), and an empty object is passed as options.
We then set the panel.webview.html property to a simple HTML string, which will be displayed inside the panel.
To show the panel, you need to execute the custom command associated with it.
By adding custom UI components and panels, you can create rich and interactive user interfaces within the VS Code editor, providing users with a seamless and immersive experience.
Testing and Debugging
To ensure the quality and reliability of your extension, it’s important to test and debug it thoroughly. VS Code provides several tools and features to help you with this process.
Setting up a testing framework for your extension
Setting up a testing framework for your extension allows you to write automated tests to verify its functionality and catch potential bugs or regressions.
You have several options when it comes to testing VS Code extensions. One popular choice is to use the Extension Testing API provided by the vscode-test package. This package allows you to run your extension in a headless VS Code instance and interact with it programmatically, making it easy to write tests.
To set up the vscode-test package, you need to add it as a dev dependency to your extension project. Open a terminal or command prompt, navigate to your extension project folder, and run the following command:
npm install --save-dev vscode-test Once the package is installed, you can create a test folder in your extension project and start writing your tests. The vscode-test package provides a set of APIs and utilities to bootstrap the test environment, launch the headless instance of VS Code, and interact with it. You can use your preferred testing framework, such as Mocha or Jest, to write the actual test cases.
Here’s an example of a basic test case using Mocha and vscode-test:
const assert = require('assert'); const { runTests } = require('vscode-test'); describe('Extension Tests', function() { this.timeout(30000); it('should say hello', async function() { const extensionDevelopmentPath = path.resolve(__dirname, '../../'); const extensionTestsPath = path.resolve(__dirname, './suite/index'); const testWorkspace = path.resolve(__dirname, './fixtures/test-workspace'); const result = await runTests({ extensionDevelopmentPath, extensionTestsPath, launchArgs: [testWorkspace], }); assert.strictEqual(result.exitCode, 0); }); }); In this example, we use Mocha as the testing framework and vscode-test to launch the headless instance of VS Code and execute the tests. The runTests() function takes an options object with the paths to the extension development folder, the test suite file, and the test workspace. We pass the testWorkspace as a launch argument, allowing the tests to run in the context of a specific workspace.
By setting up a testing framework and writing automated tests, you can ensure that your extension performs as expected and prevent regressions with future updates.
Running and debugging the extension locally
During the development process, it’s important to test and debug your extension locally to catch any issues before publishing it. VS Code provides a built-in debugger and debugging tools that can help you with this.
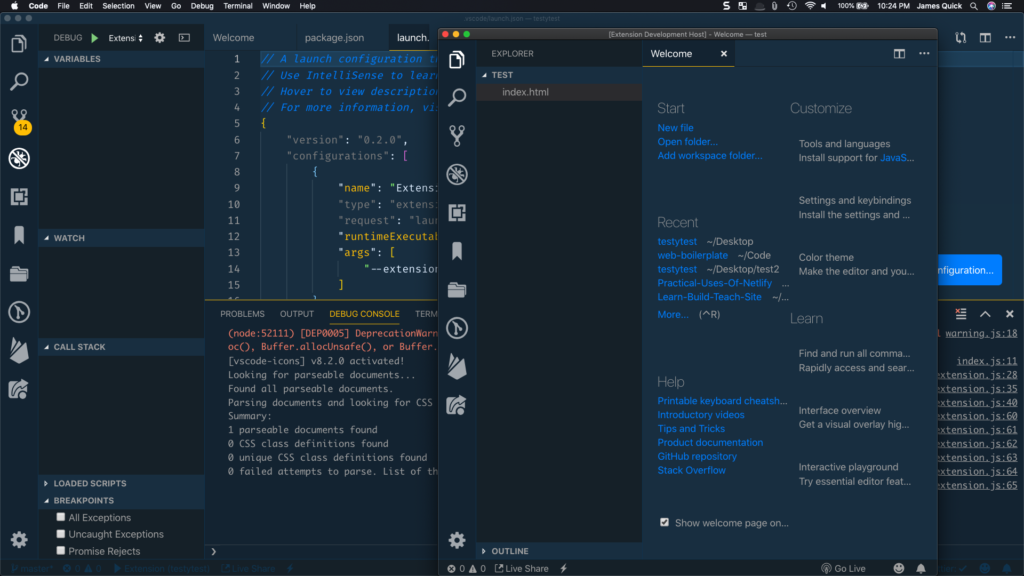
To run your extension locally, you can open the extension project folder in VS Code. Then, press F5, or go to the “Run” menu and click “Start Debugging”. This will launch a new instance of VS Code with your extension loaded in a development mode, allowing you to test it in a real-world scenario.
While your extension is running in the debug mode, you can set breakpoints in your code by clicking on the line number in the editor, or by adding a debugger statement in your JavaScript code. When the execution hits a breakpoint, you can inspect variables, step through the code, and debug any issues using the debugging tools provided by VS Code.
By running and debugging your extension locally, you can catch and fix bugs early in the development process, ensuring a smooth and reliable user experience.
Publishing Your Extension
Once you have developed and tested your extension, it’s time to publish it and make it available to the wider community of VS Code users. Fortunately, publishing extensions is a straightforward process thanks to the Visual Studio Marketplace.
Preparing the extension for publication
Before publishing your extension, it’s important to make some final preparations to ensure its quality and compatibility. Here are some steps you can take:
-
Test extensively: Ensure that your extension works as expected and doesn’t have any major bugs or issues. Consider different use cases and scenarios that your users might encounter and test accordingly.
-
Optimize performance: Make sure that your extension is fast and responsive, and doesn’t consume excessive resources. Optimize any resource-intensive operations or algorithms to ensure a smooth experience for your users.
-
Update documentation: Provide comprehensive documentation that explains how to use your extension, its features, and any requirements or dependencies. Include examples, tutorials, and troubleshooting guides to assist users in getting started and using your extension effectively.
-
Consider security: Review your code for any security vulnerabilities or potential risks. Validate and sanitize any user inputs or data to prevent common security issues like cross-site scripting (XSS) attacks or remote code execution.
-
Ensure compatibility: Make sure that your extension is compatible with the latest version of VS Code, as well as any dependencies or third-party libraries it relies on. Test your extension with different versions of VS Code to ensure that it works correctly across different environments.
By following these steps, you can ensure that your extension is of high quality and ready for publication.
Creating a Visual Studio Marketplace account
To publish your extension, you need to create an account on the Visual Studio Marketplace (https://marketplace.visualstudio.com/). The Visual Studio Marketplace is the official platform for distributing and discovering extensions for Visual Studio Code.
Creating an account is free and straightforward. Simply go to the Visual Studio Marketplace website and click on the “Sign in” button. You will be prompted to sign in with your Microsoft or GitHub account, or create a new account if you don’t have one.
Once you have created an account and signed in, you can proceed to publish your extension.
Packaging and uploading the extension
To package your extension for publication, you need to create a .vsix file, which is a compressed file format specifically designed for VS Code extensions.
To create a .vsix file, you can use the vsce (VS Code Extension) command-line tool provided by Microsoft. The vsce tool helps you package, publish, and manage your extensions.
To install the vsce tool, open a terminal or command prompt and run the following command:
npm install -g vsce Once the tool is installed, navigate to your extension project folder and run the following command to package your extension:
vsce package This will create a .vsix file in the project folder, containing all the necessary files and metadata of your extension.
To publish the extension, go to your Visual Studio Marketplace dashboard (https://marketplace.visualstudio.com/manage/publishers) and click on “New Extension”. Fill in the required information, including the .vsix file, a detailed description, screenshots, and any other relevant details.
After submitting your extension for publication, it will go through a review process by the Visual Studio Marketplace team. Once approved, your extension will be available for everyone to download and install.
Congratulations! You’ve successfully published your VS Code extension and made it accessible to the vast user community.
Promoting and Maintaining Your Extension
Creating and publishing your VS Code extension is just the beginning. To ensure its success and maintain its relevance, you need to actively engage with the VS Code community and address user feedback and feature requests.
Writing effective documentation and README
One of the key factors that contribute to the success of an extension is its documentation. Well-written and comprehensive documentation helps users understand how to use your extension, troubleshoot issues, and take full advantage of its features.
Provide clear and concise instructions on how to install, configure, and use your extension. Include examples and code snippets to demonstrate the functionality and illustrate best practices. Consider creating interactive tutorials or video guides to assist users in getting started and becoming proficient with your extension.
The README file is the first thing users see when they visit your extension’s page in the Visual Studio Marketplace. Make sure to provide a compelling and informative description of your extension, highlighting its unique features and benefits. Include relevant badges or icons to showcase compatibility ratings, download counts, and user ratings.
Regularly updating your documentation and README file ensures that users have access to the latest information and guidance for using your extension effectively.
Engaging with the VS Code community
Active engagement with the VS Code community is crucial for promoting your extension and building a user base. Here are some effective ways to engage with the community:
-
Participate in forums and discussion boards: Join relevant forums and discussion boards, such as the VS Code community forums or Stack Overflow, where you can answer questions, provide assistance, and share your expertise. This helps establish yourself as an authority in your domain and build trust with users.
-
Contribute to open-source projects: If your extension relies on or complements existing open-source projects, consider contributing bug fixes, improvements, or new features to those projects. This helps foster a collaborative environment and increases the exposure of your extension to the project’s user base.
-
Attend and speak at conferences and meetups: Participate in conferences, meetups, or webinars related to VS Code or the programming languages and frameworks your extension supports. These events provide opportunities to network, share your knowledge, and gain visibility in the community.
-
Collaborate with other extension authors: Build relationships with other extension authors who are creating complementary or related extensions. Collaborate on joint projects, cross-promote each other’s extensions, or share insights and experiences. This helps expand your reach and attract users who are interested in the combined functionality of multiple extensions.
By actively engaging with the VS Code community, you can build a strong user base, gather valuable feedback, and establish your extension as a go-to solution within your niche.
Handling user feedback and feature requests
User feedback is an invaluable resource for improving your extension and addressing the needs of your users. Actively encourage users to provide feedback, report bugs, and suggest new features or enhancements.
Set up a communication channel for users to reach out to you, such as an email address, a dedicated GitHub repository for issue tracking, or a feedback form on your extension’s website. Respond promptly to user inquiries, acknowledge their feedback, and provide regular updates on bug fixes and new feature implementations.
Consider organizing beta-testing programs or early access releases to gather feedback and identify potential issues before a major release. This allows you to involve users in the development process and make them feel valued as contributors to the success of your extension.
By actively listening to user feedback and incorporating their ideas and suggestions into your extension, you demonstrate a commitment to continuous improvement and ensure that your extension remains relevant and useful over time.
Best Practices for Extension Development
When developing a VS Code extension, it’s important to follow best practices that ensure the quality, performance, and compatibility of your code.
Following coding conventions and standards
Consistent and readable code is essential for maintaining and collaborating on your extension. Organize your code in a structured manner, adhere to a consistent naming convention, and use meaningful variable and function names.
Follow established coding guidelines and standards for the programming language you are using. Use code linters and formatting tools to enforce these standards and catch potential issues during development.
Consider using a version control system like Git and leveraging features like branching and pull requests to manage your codebase effectively. This allows you to collaborate with other developers and easily roll back changes if needed.
Optimizing performance and resource usage
Performance is key for a smooth and responsive user experience. Optimize your extension’s performance by avoiding unnecessary computations, minimizing memory and CPU usage, and optimizing data processing algorithms. Utilize background processes or threads for long-running tasks to prevent blocking the main user interface.
Keep your extension’s footprint small by only including necessary dependencies and reducing unnecessary dependencies. Minimize the number of external requests or network calls your extension makes, as these can impact performance and user experience.
Avoid memory leaks and resource leaks by properly managing resources and cleaning up after operations. Dispose of any subscriptions, timers, or other resources that are no longer needed.
Ensuring compatibility with different VS Code versions
VS Code is actively developed and receives regular updates. To ensure that your extension remains compatible with different versions of VS Code, stay informed about the latest updates and changes to the VS Code extension API.
Test your extension with different versions of VS Code to identify any compatibility issues or breaking changes. Ensure that your extension gracefully handles API changes and falls back to alternative approaches when needed.
Consider using feature flags or conditional checks to enable or disable certain functionality depending on the version of VS Code being used. This allows you to provide backward compatibility while taking advantage of newer features in newer versions.
By following best practices for extension development, you can create high-quality extensions that deliver a seamless and optimized experience to users.
Conclusion
Congratulations on completing this beginner’s guide to creating a VS Code extension! You’ve learned about the purpose and benefits of VS Code extensions, as well as the necessary steps to create, test, publish, and maintain your own extension.
Remember that extension development is an iterative process. As you gain more experience and receive feedback from users, you can continue to enhance and expand your extension to meet the evolving needs of the developer community.
Don’t be afraid to explore and innovate with extensions. VS Code provides a rich extension framework and a thriving community, making it an exciting and rewarding platform for extension development.
Now, armed with this knowledge, it’s time for you to start creating your very own VS Code extension. Happy coding!
