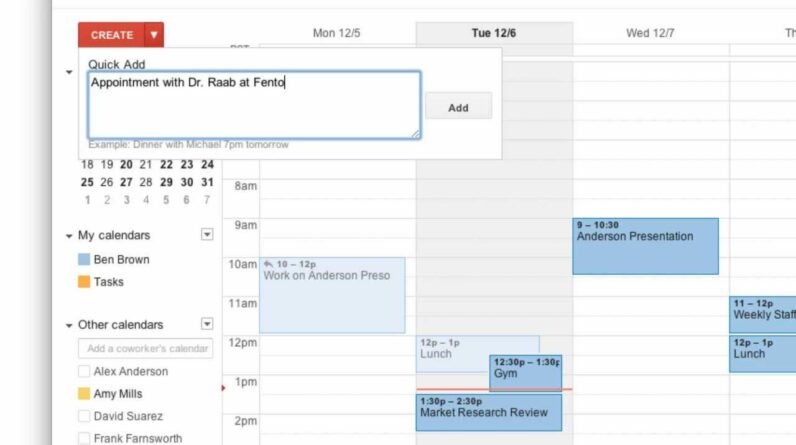
Imagine a world where your schedule is effortlessly organized, events are seamlessly shared, and you never miss an important appointment again. Well, my friend, that world exists, and it goes by the name of Google Calendar. In just a few simple steps, you can unlock the power of this digital wonder and take control of your hectic life. So, grab a cup of coffee, sit back, and let me show you how to create a Google Calendar that will revolutionize the way you schedule and stay organized.
In this article, we will embark on a journey into the realm of Google Calendar and discover the magic it holds. We’ll explore the ins and outs of creating a calendar from scratch and uncover the secrets of effortlessly sharing it with friends, family, and colleagues. So, whether you’re a student juggling classes, a professional managing deadlines, or simply someone who wants to bring order to their life, this guide is your golden ticket to mastering the art of Google Calendar. Trust me, my friend, you’ll never look back once you’ve experienced the convenience and efficiency it brings. Let’s get started on this transformative adventure together!
Table of Contents
How to Create a Google Calendar
Creating a Google Calendar is a simple and convenient way to organize your schedule, deadlines, and events. Whether you’re a student, professional, or simply someone looking to stay organized, Google Calendar offers a range of features to help you manage your time effectively. In this article, we will guide you through the process of creating a Google Calendar, customizing its settings, adding events, and utilizing advanced features.
Create a Google Account
Before you can create a Google Calendar, you will need a Google Account. If you already have one, you can skip this step. If not, follow these simple steps to create your Google Account:
- Visit the Google Account Creation Page: Open your web browser and go to the Google Account creation page.
- Fill in the Required Information: Provide your first and last name, desired email address, password, and phone number. Ensure that the email address you choose is unique and memorable.
- Agree to Google’s Terms of Service and Privacy Policy: Take a few moments to review Google’s terms and policies. Once you’ve read and understood them, click on the checkboxes to agree.
- Complete the Account Creation Setup: Follow the prompts to complete the setup process, which may include providing additional personal information and setting up account recovery options.
Once you’ve successfully created your Google Account, you’re ready to move on to accessing Google Calendar.
Access Google Calendar
To access Google Calendar, follow these steps:
- Visit the Google Calendar Website: Open your web browser and visit the Google Calendar website.
- Sign In with Your Google Account: Click on the “Sign In” button and enter the email address and password associated with your Google Account.
- Familiarize Yourself with the Calendar Interface: Once you’re signed in, take a moment to explore the various options and features within the Google Calendar interface. Familiarize yourself with the different views, settings, and navigation menus.
Now that you’re logged in to Google Calendar, let’s move on to setting up your new calendar.
Set Up Your New Calendar
Setting up a new calendar in Google Calendar allows you to create a dedicated space for specific events, tasks, or activities. Follow these steps to set up your new calendar:
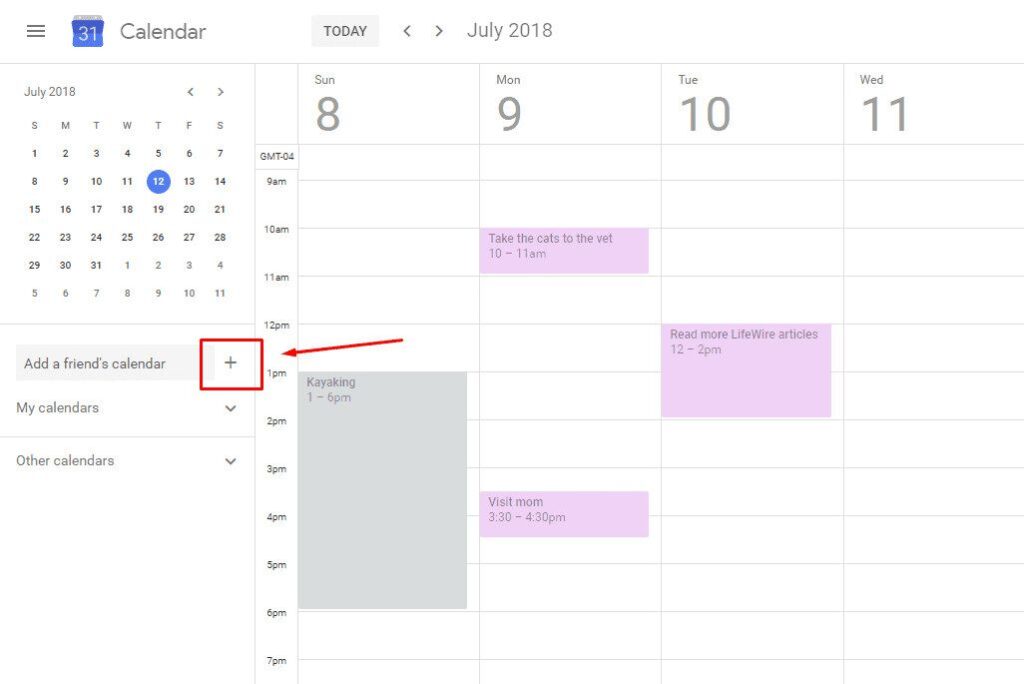
- Click on the ‘Create’ Button: On the left-hand side of the Google Calendar interface, click on the “+” button next to “Add a coworker’s calendar.”
- Provide a Name for Your Calendar: Choose a descriptive name for your calendar, such as “Work”, “Personal”, or “School”. This will help you differentiate between different calendars if you choose to create multiple ones.
- Choose a Time Zone: Select your current time zone from the drop-down menu. This ensures that events and reminders are displayed accurately based on your location.
- Adjust Additional Calendar Settings: Customize your calendar’s additional settings, such as the default event duration and time zone display format.
- Save Your New Calendar: Once you’re satisfied with the settings, click on the “Create calendar” button to save your new calendar.
Congratulations! You’ve successfully set up your new calendar. Now, let’s explore how you can personalize and customize your calendar settings.
Customize Your Calendar Settings
Customizing your Google Calendar settings allows you to tailor the calendar to suit your specific needs and preferences. Follow these steps to access and modify your calendar settings:
- Access Calendar Settings: Click on the gear icon in the top-right corner of the Google Calendar interface, then select “Settings” from the drop-down menu.
- Modify General Settings: In the “General” tab of the settings menu, you can customize options such as your calendar’s language, date and time format, and default view.
- Customize Notifications and Event Reminders: In the “Notifications” tab, you can configure how and when you receive notifications and event reminders. You can choose to be notified via email, desktop notifications, or mobile alerts.
- Change Default Event Duration and Time Zone: In the “Event settings” tab, you can adjust the default duration of new events and select your preferred time zone display format.
- Set Calendar Sharing Options: In the “Access permissions” tab, you can specify who can view, edit, or manage your calendar. You can also enable public access or share your calendar with specific individuals.
- Adjust Appearance and Display Settings: In the “Appearance” tab, you can personalize your calendar’s color scheme and choose how events are displayed.
Once you’ve customized your calendar settings to your liking, you’re ready to start adding events to your calendar.
Add Events to Your Calendar
Adding events to your Google Calendar is a straightforward process. Follow these steps to add events to your calendar:
- Click on the Desired Date and Time: Navigate to the date and time on your calendar where you want to add a new event.
- Provide Event Details: Enter the title, location, and description of the event in the popup window. You can also add attachments or add a video conferencing link if needed.
- Choose Event Visibility: Select the desired visibility for your event. You can keep it private, share it with specific individuals, or make it public.
- Set Event Reminders: Choose if and when you want to be reminded about the event. You can set up email reminders, pop-up notifications, or push notifications to your mobile device.
- Add Event Guests: If the event involves other people, you can invite them by entering their email addresses. They will receive an invitation to the event and can accept or decline.
- Save Your Event: Click on the “Save” button to add the event to your calendar.
Congratulations! You’ve successfully added an event to your Google Calendar. Let’s now explore how you can utilize reminders and notifications effectively.
Use Reminders and Notifications
Reminders and notifications in Google Calendar help ensure that you never miss an important event or deadline. Follow these steps to enable and configure reminders and notifications:
- Enable Reminders and Notifications: In the calendar settings, navigate to the “Notifications” tab.
- Configure Reminder Time and Delivery Method: Specify the time before an event when you want to receive a reminder. You can choose to receive reminders via email, pop-up notifications, or mobile notifications.
- Adjust Event Notification Settings: You can also customize the notifications for specific events by selecting the event and clicking on the “Edit event” button. From there, you can configure event-specific reminder settings.
By utilizing reminders and notifications effectively, you can stay on top of your schedule and never miss an important event. Now, let’s explore how you can share your calendar with others.
Share Your Calendar
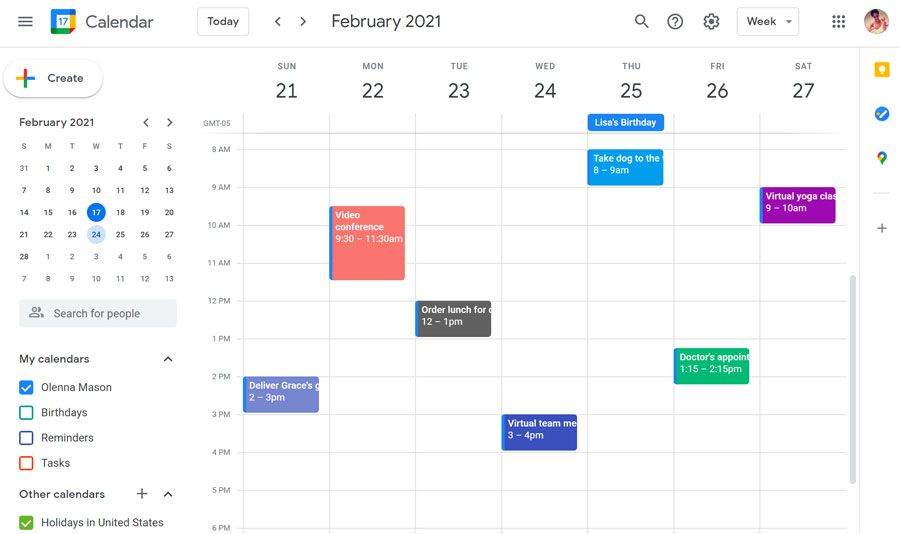
Sharing your calendar with others allows you to collaborate, schedule meetings, and keep everyone in the loop. Follow these steps to share your calendar:
- Access Calendar Settings: In the calendar settings, navigate to the “Access permissions” tab.
- Select ‘Share with Specific People’: Choose the option to share your calendar with specific individuals.
- Add Email Addresses of People to Share With: Enter the email addresses of the people you want to share your calendar with. You can enter multiple email addresses.
- Set Their Permissions and Access Level: Choose whether they can only view your calendar or have editing access. You can also determine whether they can see private events.
- Send Invitations: Once you’ve set the permissions and access level, click on the “Send” button to send invitations to the selected individuals.
Sharing your calendar with others is a great way to coordinate schedules, collaborate on projects, and plan events together. Let’s now explore how you can collaborate with others on your calendar.
Collaborate with Others on Your Calendar
Collaborating with others on your Google Calendar enhances productivity and streamlines communication. Follow these steps to collaborate effectively:
- Share Calendar with Editing Access: When sharing your calendar, grant editing access to those individuals who need to make changes or add events to your calendar.
- Set Up Conference Rooms and Resources: In addition to inviting individuals, you can also invite conference rooms or resources to your events. This ensures that all necessary resources are booked and available for meetings or events.
- Allow Others to RSVP to Your Events: When creating events, you can enable RSVP options, allowing guests to indicate whether they will be attending. This helps you plan and manage your schedule more effectively.
- Request Access to Other Calendars: If you need access to someone else’s calendar, you can request access through Google Calendar. This allows you to view their events and collaborate more seamlessly.
By collaborating with others on your calendar, you can maximize efficiency and ensure everyone stays on the same page. Let’s now explore some of the advanced features available in Google Calendar.
Explore Advanced Calendar Features
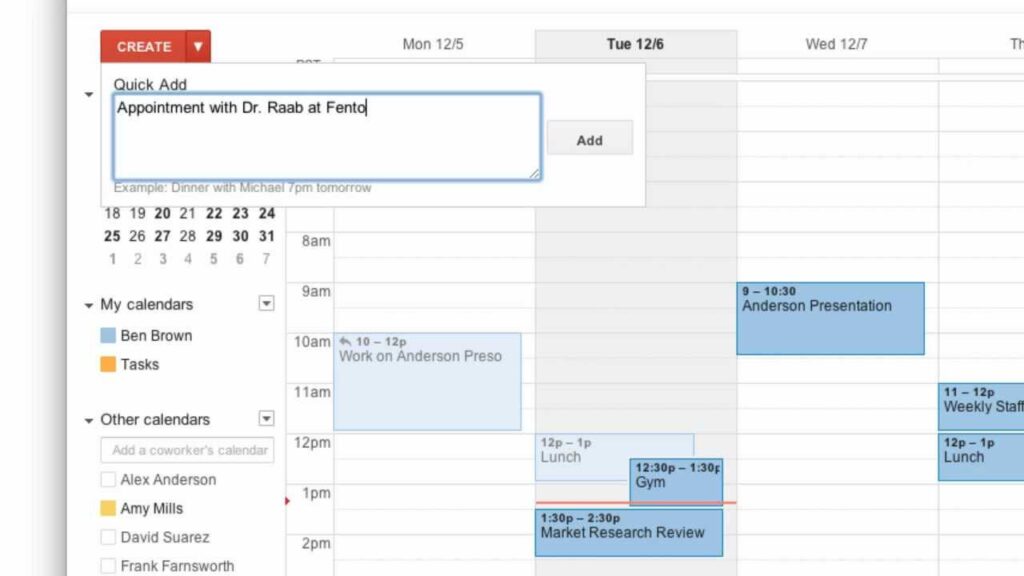
Google Calendar offers a range of advanced features to take your scheduling and time management to the next level. Here are some features to explore:
- Create Multiple Calendars: If you have different areas of your life or work that require separate scheduling, you can create multiple calendars within your Google Account. This allows you to keep things organized and easily switch between different calendars.
- Use Schedule View, Day, Week, and Month Views: Google Calendar provides different views to suit your preferences and needs. Experiment with schedule view, day view, week view, and month view to find the layout that works best for you.
- Import and Export Calendars: You can import and export calendars in Google Calendar, making it easy to merge schedules or share calendars with others.
- Discover Integration with Other Google Services: Explore the integration of Google Calendar with other Google services, such as Gmail and Google Meet. This allows you to seamlessly schedule events and meetings directly from your email interface.
By exploring these advanced calendar features, you can further enhance your productivity and streamline your scheduling process.
In conclusion, creating and utilizing a Google Calendar is an efficient and effective way to manage your time, stay organized, and collaborate with others. By following the steps outlined in this article, you can create a Google Calendar, customize its settings, add events, utilize reminders and notifications, share your calendar, collaborate with others, and explore advanced features. With Google Calendar by your side, you’ll never miss an important event or deadline again. Happy scheduling!


