Hi there! In this article, we’ll be discussing how to create tutorials. You’ll learn all the ins and outs of crafting informative and engaging tutorials that will captivate your audience. We’ll cover everything from the importance of clear instructions to effective visual aids. So, get ready to gain some valuable insights into the art of tutorial creation. Let’s get started!
Table of Contents
How to Create Tutorials
Creating tutorials can be a rewarding and effective way to share your knowledge and expertise with others. Whether you want to teach a specific skill or provide guidance on a particular topic, tutorials offer a step-by-step approach that allows learners to grasp concepts easily. In this article, we will guide you through the process of creating tutorials, from choosing a topic to analyzing their performance.

Choosing a Topic for Your Tutorial
Before you start creating a tutorial, it is essential to choose a topic that aligns with your areas of expertise or knowledge. Consider what you are most passionate about and what you can teach effectively. Identifying your strengths will not only make the process more enjoyable for you but also ensure you deliver valuable content to your audience.
Next, think about your target audience. Who are you creating this tutorial for? Are they beginners, intermediate learners, or experts in the field? Understanding your audience’s level of knowledge will help you tailor your tutorial to their needs, ensuring they can effectively follow along and grasp the concepts you are teaching.
Additionally, it is crucial to research popular topics in your niche. Identify what people are interested in learning and what gaps exist in the available tutorial content. By choosing a topic that is in demand, you increase the chances of attracting a wider audience to your tutorial.
Planning Your Tutorial
Once you have chosen a topic, it is time to break down the steps or concepts involved in the tutorial. This step is crucial as it ensures you deliver the content in a logical and organized manner. Consider the sequence in which the steps should be performed or the concepts should be presented, and think about any prerequisites or foundational knowledge that may be required.
Creating an outline of your tutorial will provide you with a roadmap to follow when recording or presenting the content. It keeps you focused and ensures you cover all necessary points without going off track. Your outline can include headings or major sections along with subheadings for more detailed steps or explanations.
Before you start creating your tutorial, gather all the necessary materials or resources. This may include any visuals, examples, or reference materials that will enhance the learning experience for your audience. Having all the materials ready will make the tutorial creation process smoother and more efficient.
Designing the Tutorial Content
When it comes to designing the content for your tutorial, it is crucial to use clear and concise language. Avoid using complex jargon or technical terms that might confuse your audience. Explain concepts in simple terms, and provide examples or analogies to help clarify any intricate ideas.
In addition to clear language, including relevant visuals or examples can significantly enhance your tutorial’s effectiveness. Visual aids can make complex concepts easier to understand, while examples can demonstrate practical applications. Use images, diagrams, or even screencasts to illustrate key points and make them more memorable for your audience.
Organizing your content logically is another essential aspect of tutorial creation. Group related steps or concepts together and ensure a smooth flow from one section to the next. This organization will help learners stay engaged and understand the progression of the tutorial.
Recording the Tutorial
Once you have planned and designed your tutorial content, it is time to record the actual tutorial. Choosing the appropriate recording software is essential to ensure a smooth and professional recording process. There are various options available, ranging from free screen recording tools to more robust video editing software. Experiment with different options and choose one that fits your needs and budget.
Before you hit the record button, set up a suitable recording environment. Find a quiet and well-lit space where you can record without interruptions. Make sure your equipment, such as cameras or microphones, are in good working condition. A clutter-free and visually appealing background can also enhance the overall quality of your tutorial.
When recording, pay attention to both audio and video quality. Invest in a good microphone to ensure clear and crisp audio. Adjust the microphone settings to avoid distortions or background noise. Similarly, check the lighting conditions and camera settings to ensure a bright and visually pleasing video.
Editing the Tutorial
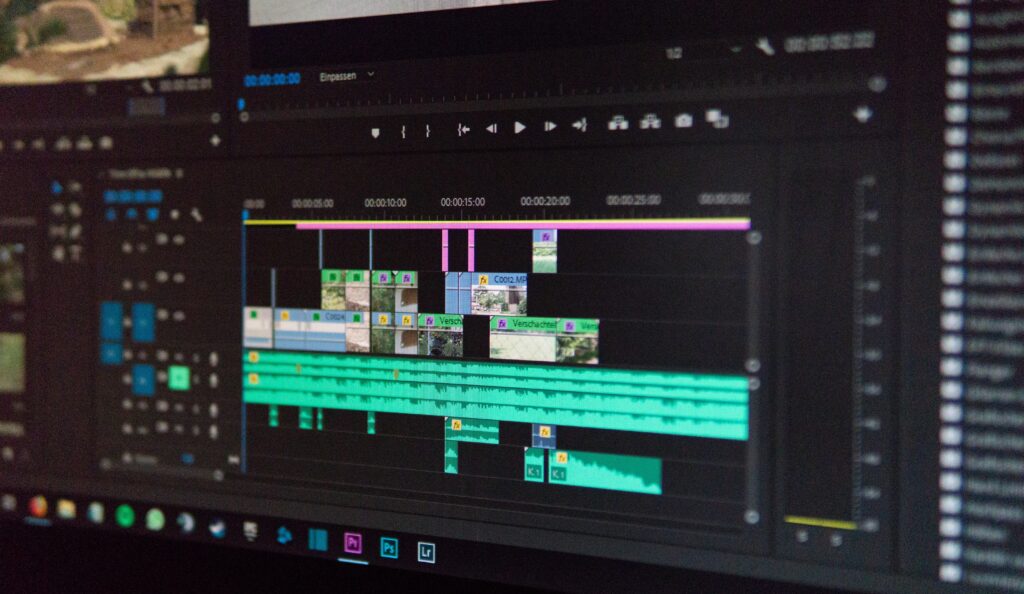
After recording the tutorial, the next step is to edit the footage. Trimming or cutting unnecessary parts can help keep the tutorial concise and engaging. Remove any mistakes or pauses that may distract viewers from the main content. However, be cautious not to remove critical information or steps that are essential for learners to follow.
Enhancing the audio and video quality is another aspect of the editing process. Adjust the volume levels, reduce background noise, and improve the overall audio clarity. Similarly, enhance the video by adjusting brightness, contrast, or color saturation if necessary. Editing software provides various tools and effects to help you achieve the desired results.
While editing, consider adding captions or subtitles to make your tutorial more accessible to a wider audience. This allows viewers to follow along even if they have hearing impairments or if English is their second language. Captions also enhance comprehension and make it easier for learners to locate specific information in the tutorial.
Adding Extra Features
To make your tutorial more interactive and engaging, consider including interactive elements. Depending on the platform you choose to host your tutorial, you may have the option to include quizzes, interactive exercises, or assessments. These features not only test learners’ understanding but also provide them with immediate feedback, creating a more immersive learning experience.
Providing downloadable resources is another way to add value to your tutorial. Consider creating worksheets, cheat sheets, or additional reference materials that learners can download and use alongside the tutorial. These resources can serve as handy references, reinforcing the concepts taught in the tutorial.

Uploading and Publishing the Tutorial
Once your tutorial is ready, it is time to select a platform or website for hosting the tutorial. Consider platforms that have a significant user base in your niche, as they will help you reach a wider audience. Popular options include YouTube, Udemy, or your own website. Each platform has its own guidelines and requirements, so familiarize yourself with them before uploading your tutorial.
To optimize your tutorial’s visibility, pay attention to the title and description. Craft a compelling and descriptive title that attracts viewers’ attention and accurately reflects the content of the tutorial. In the description, provide a concise overview of what learners can expect from the tutorial. Including relevant keywords can also improve the discoverability of your tutorial through search engines.
Promoting your tutorial through social media or email marketing can help you reach more potential learners. Share snippets or highlights from the tutorial on your social media platforms and encourage your followers to watch the full tutorial. Consider leveraging email marketing by sending newsletters or updates to your existing subscribers, inviting them to check out your latest tutorial.
Engaging with Viewers and Gathering Feedback
Engaging with your viewers is a crucial part of the tutorial creation process. Encourage viewers to leave comments or questions, and make an effort to respond promptly and thoroughly. This interaction not only shows your commitment to helping learners but also fosters a sense of community around your tutorials.
Responding to viewer inquiries or feedback is an excellent opportunity to clarify any doubts or address any confusion in your tutorial. It also provides insights into the areas where learners struggle, helping you identify points that may need further clarification or explanation. Use this feedback to continuously improve and refine your future tutorials.

Analyzing the Tutorial’s Performance
To measure the success and impact of your tutorial, it is essential to analyze its performance. Track the number of views, engagement metrics, and completion rates to understand how well your tutorial is received. These analytics will help you identify which parts of the tutorial resonate the most with viewers and which areas may need improvement.
Analyzing viewer demographics and preferences can provide valuable insights as well. Understanding your audience’s characteristics such as age, location, or educational background can help you tailor future tutorials to better suit their needs. Analyze the feedback you receive from viewers and use it to improve both the tutorial’s content and its delivery.
Conclusion
Creating tutorials is an incredible way to share your knowledge and empower others to learn new skills. By following the steps outlined in this article, you can create tutorials that are informative, engaging, and cater to your target audience’s needs. Remember to choose a topic that you are passionate about, plan and design the content effectively, record and edit with attention to detail, and continuously engage with your viewers. Start creating your own tutorials today and inspire others to learn alongside you.


