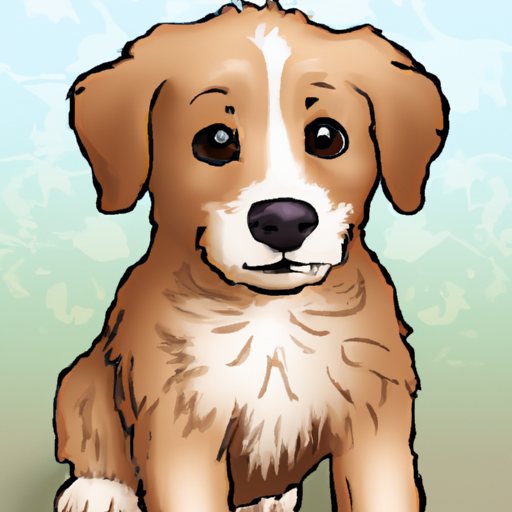
Do you love dogs? Have you ever wanted to learn how to draw one? Well, you’re in luck because today I’m going to show you a step-by-step guide on how to draw a dog. By the end of this article, you’ll be able to create your own adorable canine masterpiece.
Drawing a dog may seem daunting at first, but with a few simple steps, you’ll see that it’s actually quite easy. We’ll start by outlining the basic shapes of the head and body, and then we’ll add in the details like the eyes, nose, and ears. Don’t worry if you’re not an expert artist – this tutorial is designed for beginners, so anyone can give it a try! So grab a pencil and paper, and let’s get started on your artistic journey of drawing a dog. In the next paragraph, we’ll dive into the first step of the process, so stay tuned!
Table of Contents
How to Draw a Dog: Step-by-Step Guide
Drawing is a wonderful way to express your creativity and capture the beauty of the world around you. If you’re looking to draw a dog, whether for a pet portrait or just for fun, this step-by-step guide will walk you through the process. With the right materials, understanding of dog anatomy, and some practice, you’ll be amazed at what you can create. So let’s dive in and learn how to draw a dog!

Choosing the Right Materials
Before you begin your drawing, it’s important to select the right materials. Here are some tips for choosing the right drawing paper, pencils, and erasers.
Selecting the Right Drawing Paper
When it comes to drawing a dog, choosing the right paper is essential. Look for paper that is specifically designed for drawing, such as Bristol board or heavyweight drawing paper. These types of paper are ideal for pencil drawings, as they have a smooth surface that allows for precise lines and shading.
Choosing the Right Pencils and Erasers
When it comes to drawing a dog, you’ll want to have a variety of pencils and erasers at your disposal. Start with a set of graphite pencils, ranging from soft to hard. The soft pencils will give you darker, bolder lines, while the hard pencils are great for adding fine details.
In addition to pencils, make sure to have a kneaded eraser and a vinyl eraser. The kneaded eraser is great for lifting graphite and creating highlights, while the vinyl eraser is more effective at erasing larger areas.
Preparing the Workspace
Now that you have your materials ready, it’s time to prepare your workspace. This will ensure that you have a comfortable and well-lit environment for your drawing.
Clearing the Area
Start by clearing your drawing area of any clutter or distractions. Having a clean and organized space will help you focus on your artwork and prevent any accidental smudging or mistakes.
Setting Up Adequate Lighting
Next, make sure you have adequate lighting. Natural light is ideal, so try to set up your workspace near a window. If that’s not possible, consider using a desk lamp with a bright white bulb to simulate natural light. Proper lighting will help you see the details of your drawing and ensure accurate shading.
Understanding Dog Anatomy
To draw a realistic dog, it’s important to have a basic understanding of dog anatomy. This will help you capture the proportions and features that make each breed unique.
Studying Different Breeds
Start by studying different breeds of dogs. Look at photographs or visit a local dog park to observe their different shapes, sizes, and textures. Each breed has its own distinct characteristics, so it’s important to get familiar with the breed you want to draw.
Learning the Basic Structure
Once you have a good understanding of different breeds, it’s time to learn the basic structure of a dog. Dogs have a skeleton and muscles, just like humans, but their proportions and joint placement can vary. Study dog anatomy books or online resources to get a sense of how their bodies are put together. Pay attention to the placement of the head, limbs, and tail, as well as the overall proportions.
Sketching the Basic Outline
With your knowledge of dog anatomy, you’re ready to start sketching the basic outline of your dog. This is where you’ll establish the overall shape and size of the dog.
Starting with Basic Shapes
Begin by lightly sketching basic shapes to represent the head, body, and limbs of the dog. Use simple circles, ovals, and rectangles to establish the proportions. Don’t worry about getting everything perfect at this stage; it’s just a rough guide to work from.
Refining the Shape to Resemble a Dog
Once you have the basic shapes in place, start refining the outline to resemble a dog. Pay attention to the curves and angles in the body, and make adjustments as needed. Use lighter pencil strokes at this stage, as you’ll be adding more details later on.

Adding Details and Features
Now it’s time to bring your dog to life by adding details and features.
Drawing the Face and Eyes
Start with the face and eyes, as they are often the most expressive part of a dog. Use careful observation to capture the unique characteristics of the breed you’re drawing. Pay attention to the shape of the eyes, the placement of the nose, and the structure of the mouth. Don’t be afraid to spend extra time on the eyes, as they are often the focal point of the drawing.
Adding Ears, Nose, and Mouth
Next, add the ears, nose, and mouth to your drawing. Again, refer to your reference photos or observations to ensure accuracy. Dogs’ ears come in a variety of shapes and sizes, so make sure to capture the specific characteristics of the breed you’re drawing. Pay attention to the placement of the nose and mouth, as they can greatly impact the expression of the dog.
Creating Realistic Fur
One of the key elements in drawing a realistic dog is capturing the texture of its fur.
Understanding Fur Texture
Different breeds have different types of fur, ranging from short and smooth to long and curly. Take some time to observe and study the texture of the fur on the breed you’re drawing. Pay attention to the direction and flow of the fur, as well as any patterns or markings. Understanding these details will help you create a more realistic drawing.
Utilizing Shading and Strokes for Realism
To create the illusion of fur, use shading and different pencil strokes. Start by shading the darker areas of the dog’s body, such as the shadowed areas under the chin, around the eyes, and in the ears. Use lighter strokes to depict the lighter areas of the fur, such as the highlights on the top of the head or along the back. Experiment with different pencil strokes, such as hatching, cross-hatching, or stippling, to create texture and depth.
Filling in Colors
Once you have your basic drawing and shading in place, you can choose to add color to your dog.
Choosing the Right Color Palette
Select a color palette that matches the breed you’re drawing. Dogs come in a wide range of colors, from black and white to vibrant shades of red or blue. Study reference photos or observe dogs in real life to see the variations in coat color. Use colored pencils or watercolor pencils to add subtle layers of color to your drawing.
Layering Colors for Depth
When adding color, remember to start with light, gentle layers and gradually build up the intensity. Layering colors will give your drawing depth and dimension, making it look more realistic. Pay attention to the direction of the fur and use short, light strokes to mimic the texture.
Highlighting and Shadowing
To add the finishing touches to your drawing, focus on highlighting and shadowing.
Adding Highlights to Create Shine
Use a kneaded eraser to lift graphite and create highlights on areas of the dog that catch the light. This will add shine and dimension to your drawing. Pay attention to the reflections in the eyes and on the nose, as these areas often have the most highlights.
Creating Shadows for Depth and Dimension
To create depth and dimension, add shadows to your drawing. Shadows will help ground the dog and make it appear more three-dimensional. Study your reference photos or observe lighting conditions to determine where the shadows should fall. Use a blending stump or a cotton swab to blend the shadows and create a smooth transition between light and dark areas.
Refining and Cleaning the Drawing
To complete your dog drawing, take some time to refine and clean up any mistakes or smudges.
Erasing Unnecessary Lines
Use a vinyl eraser to carefully erase any unnecessary lines or guidelines that are still visible. Be gentle with the eraser and make sure not to smudge the drawing in the process. Take your time and work slowly to achieve clean, crisp lines.
Cleaning Up Smudges and Mistakes
If you have any smudges or mistakes that can’t be erased, don’t worry! Use a clean kneaded eraser to gently dab and lift away any unwanted graphite. The kneaded eraser is especially effective at cleaning up small mistakes without damaging the surrounding areas.
Conclusion
Drawing a dog can be a rewarding and enjoyable experience. By following this step-by-step guide, you’ll be able to capture the likeness and personality of your favorite canine companion. Remember to start with the right materials, understand dog anatomy, and practice your skills. With time and patience, you’ll be amazed at the beautiful dog drawings you can create. So go ahead, grab your pencils and paper, and start drawing!


