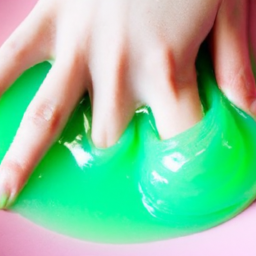
Do you want to learn how to make slime at home? It’s a fun and easy DIY project that you can do with your friends or family. Slime has become a popular trend, especially among kids and teenagers. It’s a squishy and stretchy substance that can provide hours of entertainment. In this article, we’ll walk you through the process of making slime step by step. Whether you’re a beginner or have already made slime before, you’ll find helpful tips and tricks to improve your slime-making skills. So, let’s get started and have some gooey fun!
First things first, let’s talk about the ingredients you’ll need. Slime is typically made using just a few simple household items. You’ll need some school glue, which is the base of the slime. You can use clear or white glue, depending on the type of slime you want to create. Next, you’ll need a slime activator. This can be either liquid starch, borax solution, or contact lens solution. These activators help turn the glue into a slimey texture. Lastly, you can add any optional extras to your slime, such as glitter, food coloring, or foam beads, to make it unique and personalized. Now that we have our ingredients ready, let’s dive into the step-by-step process of making slime.
Table of Contents
How to Make Slime at Home
Slime has become a popular DIY project, providing hours of fun and entertainment for both kids and adults alike. Making slime at home is not only a great way to unleash your creativity, but it can also serve as an educational activity, teaching children about mixing substances and understanding different textures. In this step-by-step guide, we will walk you through the process of making slime at home, along with some variations and troubleshooting tips. So grab your materials and let’s get started!
Materials Needed
Before we dive into the slime making process, let’s gather all the materials you will need. Here’s what you will need to create your own slime:
Glue
The main ingredient in slime is glue. You can use regular school glue or clear glue, depending on the type of slime you want to make. Make sure the glue is non-toxic and safe for children.
Water
Water is an essential component that helps in the mixing process. You will need water to create the glue solution and later on, to adjust the slime consistency if needed.
Food coloring
Adding food coloring to your slime can make it more visually appealing. Choose your favorite colors or get creative by mixing different shades to create a unique slime color.
Borax
Borax is a key element in the slime making process as it acts as a binding agent. You can easily find borax in the laundry detergent aisle of your local store.
Now that you have all your materials ready, let’s move on to preparing the slime!
Preparing the Slime
To ensure a smooth slime making process, it’s important to prepare the necessary solutions beforehand. Follow these steps to prepare the glue and borax mixtures:
Measure the glue
Pour a desired amount of glue into a mixing bowl, depending on how much slime you want to make. As a general guideline, start with 1/2 cup of glue.
Adding water and food coloring
Add some water to the glue. The amount of water will depend on the consistency you want your slime to have. Stir the mixture well until the glue is fully dissolved in the water.
Next, add a few drops of food coloring to the glue solution. Mix it thoroughly to distribute the color evenly.
Mixing the glue solution
Take another bowl and prepare the borax mixture. Add 1 cup of warm water to the bowl and dissolve 1 teaspoon of borax in it. Stir until the borax is completely dissolved.
Combining the Ingredients
Now that we have prepared the necessary solutions, it’s time to combine them to create the slime. Follow these steps:
Pouring the glue solution
Slowly pour the glue solution into the borax mixture while stirring continuously. Keep stirring until the mixture starts to come together and form a slimy consistency.
Stirring the mixture
Using a spoon or your hands, continue to stir the mixture until it becomes difficult to stir. At this point, you can start using your hands to knead and mix the slime.
Adding the borax mixture
If your slime is still sticky, you can add a few drops of the borax mixture to the slime and knead it until it reaches the desired consistency. Be cautious not to add too much borax, as it can make the slime too stiff.
Continuously stirring
Keep stirring and kneading the slime until it becomes smooth and stretchy. This may take a few minutes of continuous mixing, so be patient and keep going until you achieve the desired consistency.
Achieving the Desired Consistency
Every slime maker has their own preference when it comes to slime consistency. Here are some tips to help you achieve the texture you desire:
Observing the slime texture
As you mix and knead the slime, take a moment to observe its texture. If it feels too sticky, you may need to add more borax solution. If it feels too stiff, you can add a little water to soften it up.
Additional borax solution
If your slime is too sticky even after adding borax, you can prepare a separate borax solution by dissolving 1 teaspoon of borax in 1 cup of warm water. Dip the sticky slime into the borax solution and knead it until it becomes less sticky.
Kneading the slime
Kneading is an important step in achieving the desired consistency of your slime. The more you knead, the more the ingredients will blend and the smoother the slime will become. Keep kneading until the slime no longer sticks to your hands.
Adjusting the ingredients
If you find that your slime is too stiff or too sticky, you can adjust the ingredients accordingly. Add water to soften the slime or add more borax if it’s too sticky. Remember to make small adjustments at a time and continue kneading until the desired consistency is achieved.
Adding Fun Elements
Now that you have your basic slime ready, it’s time to add some fun elements to make it even more exciting. Here are a few ideas:
Glitter
Add a sprinkle of glitter to your slime to give it a sparkly effect. Mix it well so that the glitter is evenly distributed throughout the slime.
Confetti
Add tiny confetti pieces to your slime for a pop of color and texture. This will make your slime more vibrant and visually appealing.
Beads
Mix in some small beads to give your slime a crunchy texture. This can provide a unique sensory experience while playing with slime.
Sequins
Adding sequins to your slime can create a mesmerizing effect. Mix them in and watch as they catch the light and add a touch of glamour to your slime.
Storing and Preserving Slime
Once you’re done playing with your slime, it’s important to store and preserve it properly to maintain its freshness and texture. Here are some tips:
Sealing the slime
Always seal your slime in an airtight container to prevent it from drying out. Use a container with a tight-fitting lid to ensure that the slime stays fresh for as long as possible.
Air-tight containers
Choose containers that are specifically designed for storing slime. Mason jars, ziplock bags, or reusable plastic containers work well for this purpose.
Avoiding direct sunlight
Store your slime in a cool and dark place, away from direct sunlight. Sunlight can cause the slime to become dry and lose its stretchiness.
Maintaining cleanliness
To ensure the longevity of your slime, make sure to use clean hands when playing with it. Avoid touching the slime with dirty hands or placing it on dirty surfaces, as this can introduce unwanted particles or bacteria.
Troubleshooting Slime Issues
If you encounter any issues with your slime, don’t worry! Here are some common problems and their solutions:
Slime too sticky
If your slime is too sticky, try adding a small amount of borax solution, a drop at a time, and knead it thoroughly. This should help reduce the stickiness.
Slime too stiff
If your slime is too stiff and not stretchy enough, try adding a small amount of water and knead it until it becomes softer and more pliable.
Fixing slime consistency
If your slime is too watery or too firm, you can adjust the consistency by adding more glue or borax solution accordingly. Keep kneading until the desired texture is achieved.
Reviving old slime
If your slime has dried out over time, you can revive it by adding a few drops of water or even some fresh glue. Knead it well to blend the ingredients and restore its original texture.
Slime Variations
Now that you have mastered the art of making basic slime, it’s time to experiment with some fun variations. Here are a few ideas:
Glow-in-the-dark slime
Add glow-in-the-dark paint or glow powder to your slime to make it glow in the dark. This can be a fun activity for sleepovers or nighttime play.
Butter slime
Add clay or modeling compound to your slime to create a butter-like texture. This type of slime is softer, moldable, and has a unique feel.
Fluffy slime
Mix shaving cream or foam soap into your slime to create a fluffy and airy texture. This type of slime is light and fluffy, making it extra fun to play with.
Clear slime
Instead of using regular glue, opt for clear glue to create a transparent slime. This type of slime allows you to see through it and can be decorated with different add-ins for a stunning effect.
Slime Safety Precautions
While making and playing with slime can be a fun and enjoyable activity, it’s important to take some safety precautions:
Supervision for young children
Adult supervision is recommended when children are making and playing with slime. Ensure that they understand the importance of not ingesting the slime and using it in a safe and responsible manner.
Avoiding ingestion
Slime is not meant to be eaten. Make sure to keep slime away from your mouth and discourage others from tasting or ingesting it. If accidentally swallowed, seek medical attention immediately.
Avoiding contact with eyes
Slime ingredients, especially borax, can cause eye irritation. Avoid touching your eyes while making or playing with slime and wash your hands thoroughly after handling the ingredients.
Proper hand hygiene
Before and after playing with slime, make sure to wash your hands with soap and water. This will help prevent the spread of bacteria and ensure a safe slime-making experience.
Conclusion
Congratulations on successfully making your own slime! By following these step-by-step instructions, you can create a variety of slime textures and explore different colors and add-ins. Just remember to have fun, get creative, and enjoy the process of making slime at home. Whether you choose to make glow-in-the-dark slime, fluffy slime, or any other variation, you are sure to have countless hours of entertainment. So gather your materials, unleash your creativity, and happy slime making!


