In this article, you will learn simple steps to create a to-do list in Gmail. We will guide you through the process, ensuring that you can easily organize and keep track of your tasks within your Gmail account. By following our instructions, you will be able to efficiently manage your to-do list and increase your productivity. Let’s get started!
Table of Contents
Simple Steps to Create a To-Do List in Gmail
Are you looking for an easy and efficient way to manage your daily tasks? Look no further! With Gmail’s built-in Tasks feature, you can create a personalized to-do list that seamlessly integrates with your email account. Whether you’re tackling work projects or organizing your personal life, this guide will walk you through the simple steps to create a to-do list in Gmail and stay on top of your responsibilities.
1. Sign in to your Gmail account
The first step to access the Tasks feature is to sign in to your Gmail account. Simply open your preferred web browser and navigate to the Gmail website. Enter your email address and password to log in, and you’ll be directed to your Gmail inbox.
2. Access the Tasks feature
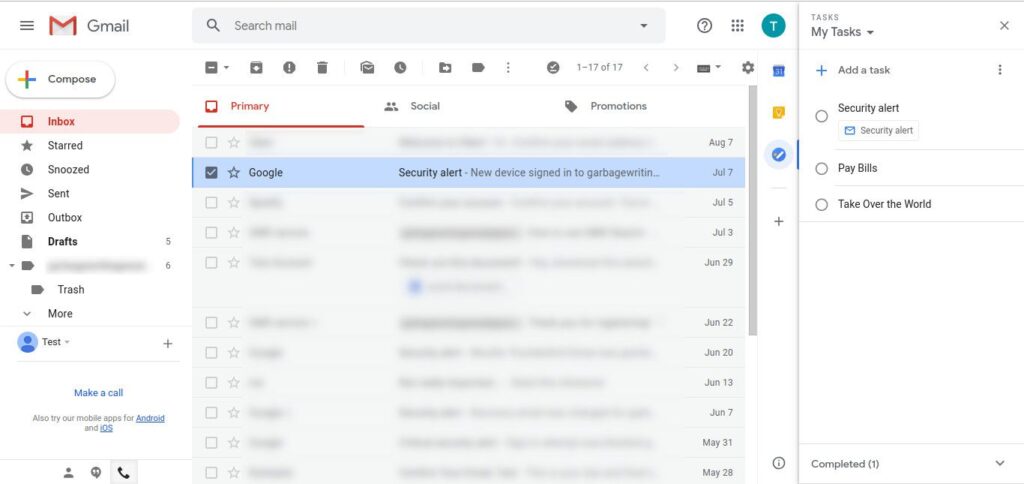
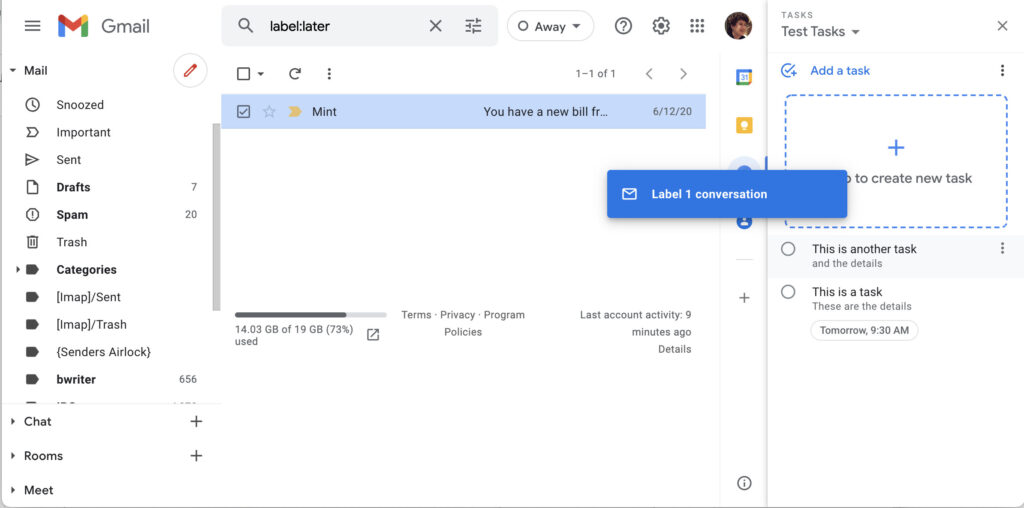
Once you’re logged in to your Gmail account, you need to access the Tasks feature. To do this, look for the ‘Tasks’ icon located in the right sidebar. It appears as a square list icon with a checkmark. Click on this icon to open the Tasks feature.
3. Create a new task
With the Tasks feature open, you can now start creating your to-do list. To add a new task, simply click on the ‘Add a task’ button located at the top of the Tasks window. A text box will appear where you can enter the task details. Type in a description or title for your task and press ‘Enter’ to save it.
4. Set due dates and create subtasks
To make your to-do list more organized and time-sensitive, you can set due dates for your tasks and create subtasks within them. To set a due date for a task, click on the task itself in your list. This will open a window where you can view and edit the task details. In the task window, click on ‘Add date’ to set a due date from the calendar that appears.
If your task requires multiple steps or subtasks, you can create them by clicking on ‘Add subtask’ within the task window. This allows you to break down a larger task into smaller, more manageable steps.
5. Organize and prioritize tasks
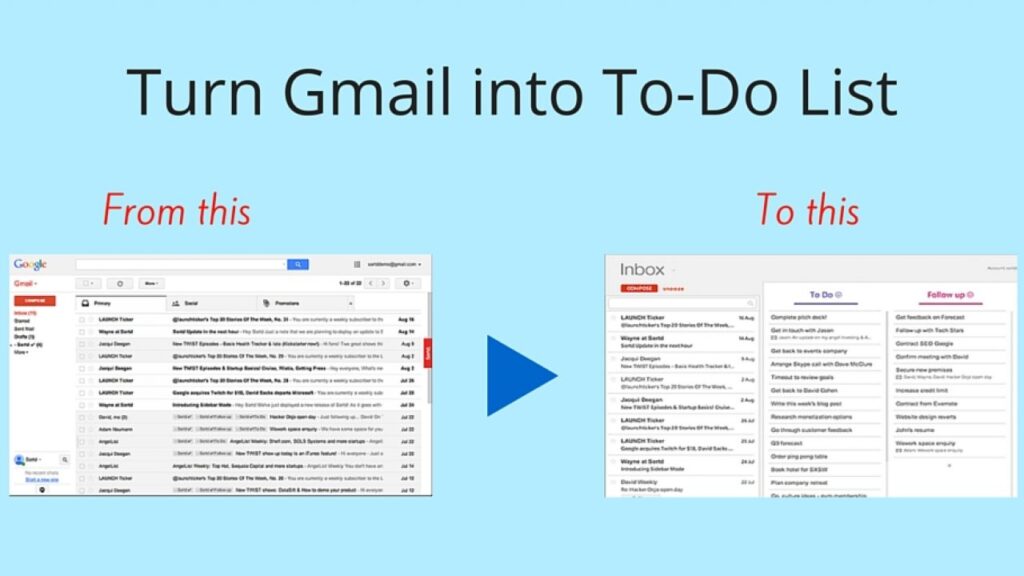
To make your to-do list even more effective, you can organize and prioritize your tasks according to your needs. Gmail’s Tasks feature offers different ways to accomplish this. First, you can rearrange your tasks by dragging and dropping them within your list. This helps you visually prioritize your tasks based on their importance or urgency.
Additionally, utilizing tasks with due dates is a great way to prioritize your workload. Tasks with approaching due dates will automatically move to the top of your list, reminding you of the tasks that require immediate attention. You can even create separate lists for different categories or projects to further organize your tasks.
6. Add notes and details to tasks
Sometimes, a task requires additional context or information. With Gmail’s Tasks feature, you can easily add notes and details to each task. Similar to the previous steps, click on the specific task to open the task window. Within this window, you’ll find an ‘Add details’ option.
Clicking on ‘Add details’ allows you to include additional notes, attachments, or any other relevant information. This feature enables you to keep all the necessary information related to a task in one centralized location, making it easier to complete your tasks efficiently.
7. Mark tasks as complete
As you complete your tasks, it’s essential to mark them as done to keep your to-do list up to date. To mark a task as complete, simply check the box next to the task in your list. Once you’ve done that, a ‘Complete’ button will appear. Click on this button, and the task will be marked as complete, and it will be moved to the bottom of your list.
Being able to visually track your progress and see the tasks you’ve completed not only brings a sense of accomplishment but also helps you stay organized.
8. Use keyboard shortcuts for efficiency
If you’re someone who prefers using keyboard shortcuts to navigate through applications, you’re in luck! Gmail’s Tasks feature offers several shortcuts that can save you time and make task management even more efficient. Here are a few essential keyboard shortcuts to remember:
- Press ‘Shift’ + ‘H’ to quickly go to the Tasks feature from anywhere in your Gmail account.
- Press ‘Enter’ to create a new task without using the mouse.
- Press ‘F’ to open the task details window, allowing you to quickly add or edit task information.
By utilizing these keyboard shortcuts, you can streamline your workflow and manage your tasks more effectively.
9. Enable email notifications for tasks
To ensure that you never miss an important task or deadline, you can enable email notifications for your tasks in Gmail. This feature sends you reminders or updates regarding your tasks directly to your email inbox.
To enable email notifications, click on the ‘Settings’ option in your Gmail account. It can be found in the top-right corner of the Gmail window, symbolized by a gear icon. In the Settings menu, navigate to the ‘Tasks’ tab. Here, you can choose your preferred email notification settings, such as receiving reminders or updates for upcoming tasks.
With email notifications enabled, you can stay on top of your tasks even when you’re away from your Gmail account.
Conclusion
Creating a to-do list is an effective way to improve productivity and stay organized. With Gmail’s built-in Tasks feature, managing your tasks becomes even easier and more convenient. By following the simple steps outlined in this guide, you can create a to-do list that perfectly suits your workflow and ensures that nothing important is forgotten.
So, what are you waiting for? Sign in to your Gmail account, access the Tasks feature, and start creating your personalized to-do list today. Boost your productivity, stay organized, and achieve your goals effortlessly with Gmail’s Tasks feature.
